Data management
Andy J. Wills
The first two sections of this worksheet are also summarized in the following slides.
Whether you’re working on a study by yourself, or with a team, it’s critical to keep organized logs and records of what was done when, and by whom. It should be possible to go back through those logs and records and for example, reconstruct if there was a problem with a particular participant. It’s also important (and often required) that you are able to share these records as part of assessments. Later on, if the work is published, good practice in open science involves sharing anonymized data, materials, and analysis scripts publicly.
This worksheet is an introduction to using github repositories as your data archive and log book. It can also (eventually) be your open science publication platform, although that aspect is not covered in the current worksheet.
Github is possibly the biggest website you’ve never heard of: 40 million users, acquired by Microfost in 2018 for $7.5bn dollars. Based on git, the system used to develop Linux, the world’s most commonly used operating system (e.g. basis of all Android phones)
In this worksheet, we’ll cover creating a private github repository, sharing that repository with your team, and accessing your private repository from Rstudio. We’ll also work through adding a file to your repository, modifying that file, and using the git log as your lab logbook. Finally, we’ll cover branching - a process we can use to recover earlier versions of files. We also use branching to work on new ideas without screwing up the main repository.
However, before we do any of those things, we need to cover a couple of topics it’s really important you understand before using github (or any other data management system):
Anonymity and privacy
We are going to use private repositories on github, which can only be accessed by the person who created the repository, and by those they choose to invite. Nevertheless, it is crucial to consider the anonymity and privacy of your participants from the very outset – before you add anything to your repository. This is for two reasons.
-
It is always possible that your repository is not as private as you would hope it to be, or that it later becomes so. As with any internet-based system, it is generally possible for the owners of the system (Microsoft) to access any information they hold on your behalf. It is also possible, either due to malicious intent (e.g. hackers) or accident (e.g. you press the wrong button) that the material in your repository becomes publicly available.
-
If your work is later published, basic principles of open science mean that you should share anonymized versions of your data, materials, and analysis scripts, publicly.
For both these reasons, even though your github repository is private, you should treat it as if it were globally public. For this reason, you must never place participants’ names, addresses, etc. on github. You must also get explicit approval from your supervisor to include an biographical information on github, even if names etc. are not included. Biographical information includes age, gender, education level, and so on. Often, it is possible to de-anonymize data if you have sufficient biographical information. For example, if your participant is recorded as a 54-year-old man in the second year of their psychology degree at Plymouth University, this information is probably sufficient to unqiuely identify that individual.
Further, never make your github repository public – leave that decision to your supervisor. If you accidentally add anything to github that might de-anonymize a participant, tell your supervisor immediately (you have a legal duty to do so).
What all of this means is that you will need to talk to your supervisor about your arrangements for linking names to arbitrary, study-specific participant numbers. Such links must never be put on github. Practices for confidentially storing these links vary between labs, make sure you understand the procedures relevant to the lab you’re working in, and treat such information as confidentially and securely as you would treat, for example, peoples’ bank details or medical records.
Good and bad types of files
Wherever possible, keep everything in open-format, text-based file formats. These include CSV files for data, plain text files for text, and R files for analysis scripts. Using these kinds of files ensures: (a) that everyone can access them, irrespective of what type of computer and software they have, (b) that github can work efficiently and effectively with these files. Most wordprocessors have the option to save as plain text, or use a text editor such as Notepad++ for Windows.
Sometimes, you have to use other types of files. The most obvious examples are pictures. For pictures, use open formats such as PNG or JPEG. Another area may be text that you wish to format (e.g. using bold, headings, and so forth). For these, consider using markdown, which is supported by Rstudio. If you absolutely have to use a wordprocessor, use an open format such as ODT, ODP rather than closed proprietary formats such as Word, PowerPoint (Microsoft). Free software such as LibreOffice defaults to such free formats, so is a good choice for creating open, shareable materials. However, keep to text-based files where you can (CSV, TXT, R) because git can tell you for such files exactly which words/numbers changed each time you update the file. It cannot do this for e.g. wordprocessor files.
Never use Excel or SPSS as a format for storing your data or analyses — for further discussion of this last point, click here.
Creating your first github repository
You should create just one repository for your whole project, to be used by all those working on your project (e.g. your project partners, your supervisor).
-
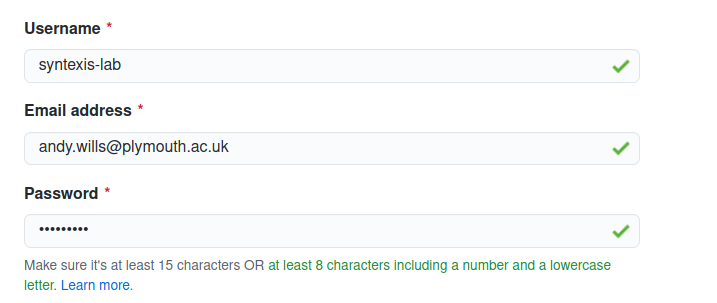
Go to github and create a username, and an account:
-
Check your email, click on link to verify your account.
-
Click ‘create repository’. Pick a name that is relevant to your project.
-
Select ‘private’
-
Select ‘add a README file’. This will allow you to add a description of your project later on.
-
Select ‘add .gitignore’, and template ‘R’. Telling git what type of files you’ll be using makes things easier. You’ll be analyzing using R, so select this.
-
Select ‘choose a licence’. It’s a principle of open science that we share our anonymous data openly, once the study is published. Choose “GNU General Public Licence v3.0”, as this will ensure anyone who re-shares your work has to do so under the same freedom-respecting conditions.
-
Click ‘create repository’
Sharing your repository
Private repositories can only been seen by people who you invite. Folow these steps to invite someone:
-
Click ‘settings’ (a cog wheel)
-
Click “manage access”
-
Click ‘invite a collaborator’. To share it, you need to know their github username. For now, share with me -
ajwills72. After the session, invite your supervisor, and your dissertation partner(s).
Creating your PAT for github
A PAT is a Personal Access Token. It’s something you need to use github and Rstudio together. It’s a bit like a password, except that you don’t get to decide what it is, github does. And, by default, it expires after 30 days, so you have to make a new one each month. This is a bit of a faff but it improves security.
So, for github, you will have both a password (which you use to login to the github website) and a PAT (which you use when Rstudio asks for your github ‘password’). IMPORTANT: Rstudio never wants your github password. It always wants your PAT. Even if it says enter your ‘password’ when accessing github, it means enter your github PAT not your github password.
To generate your github PAT, follow these steps on the github website (make sure you are logged in)
-
Click ‘generate new token’
-
You’ll see a long list of tick boxes. Select the
repo,workflowandusertick boxes. -
Click ‘generate token’.
-
Copy and paste the token, which will look something like ` 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` to a document on your laptop (e.g. a wordprocessor document). Treat this token with the same care, security and confidentiality as you would, for example, the password to your online bank account. You have to copy it somewhere because, once you click away from the github page you got it from, you can never get it from github again. This is for security. When subsequently copy-pasting your PAT from your local document, make sure you select just the PAT code - don’t include any other characters, including spaces.
Add your repository as an RStudio project
Back in the preprocessing data worksheet, you created a new RStudio project from a github repository I had created. Go back to that worksheet, and follow the instructions. BUT this time, use it to set up your own github repository as an Rstudio project, rather than the rminr-data repository. The location of your repository is:
https://github.com/your-username/your-repository-name
You will see there is an option to pick where in RStudio to place your project directory. The default is ~, which means at the top of your directory structure. DO NOT CHANGE THIS. RStudio has a bug where if you try to change this, it seems to work, but then produces a misleading error message later on, see below.
Rstudio’s misleading error message
Sometimes, when you try to add your repository as an RStudio project, you get a message saying something along the lines of ‘password access to github hasn’t been possible since 2021’. This can be caused by using your github password when Rstudio asks for your password - as mentioned before, it needs your PAT token when it asks for this. However, the same misleading error message comes up if you, for example, have mis-copied your PAT token, or if you’re trying to open a git project somewhere other than in your home directory (~).
Your computer, RStudio project, and github
Always keep in mind that there are three computers involved in building a github repository using Rstudio. The first computer is the computer on your desk/lap. We call this the ‘local’ computer. The second computer is the one running RStudio for you, which you connect to using your web browser. To get a file from your local computer to Rstudio, we must upload it to Rstudio, as we have in previous worksheets (revised here). The third computer is the one running github. To get your file onto github, we must send it from Rstudio. This process involves pulling, staging, committing, and pushing, which we’ll cover below.
Saying who you are
Next, you must tell Rstudio a little bit of information that it will share with github about your identity. At the top of the Rstudio window, select the Tools menu item, then Terminal, then New terminal. This will open a Terminal tab at the bottom left of Rstudio (same place as the Console window). In the Terminal window (not the Console window), enter the following two commands, one at a time, replacing with your own information. Use the same email and username as you used to set up your github account:
git config --global user.email "your.email@your-uni.ac.uk"
git config --global user.name "my-username"
You only need to do this once; Rstudio will then remember your answers forever, even for different repositories.
Adding your first file to RStudio
The first file you’re going to add is some aspect of the materials of your dissertation. If you haven’t generated any materials yet, create a short text file with some dummy instructions for your experiment, and upload that. If you do have some materials, pick one file for now to upload.
-
Use ‘New Folder’ under Files to create a folder called
materialsin your RStudio project. In order to keep your repository organized, it’s a good idea to use folders. I suggest a standard set such asmaterials,data, andanalysis. -
Click on the new folder
-
Click ‘upload’, use the “Browse” button under “File to upload” to select the file on your local computer, and click OK.
Adding your first file to github
-
Click on the ‘git’ tab (top right)
-
Click the tick-box ‘staged’ by the name of the folder you just created (‘materials’). Don’t add the .Rproj file, ever (it’s a special file used by Rstudio to keep track of things, and adding it to github will fill your repository with junk).
-
Click ‘Commit’, and write a short, meaningful commit message. You commit message should be less than 50 characters, and should describe the change that is being made to the github repository. For example:
Add experiment instructions -
Click ‘commit’, and then ‘Close’, and then close the commit window.
At this point, your file (e.g. ‘instructions.txt’) is ready to be added to github, but it has not yet been added. To do this, we’d click the green up arrow (known as ‘pushing’ to the repository). However, first we need to make sure that we have the latest version of the github repository. This is really important, because you have shared the repository with others, who may have made changes. To get these changes, you click the blue down arrow (known as ‘pulling’ from the repository). So, the steps are:
-
Pull from the repository: Click the blue arrow, enter your username and PAT (not password, PAT), click ‘close’.
-
Push to the repository: Click the green arrow, enter your username and PAT (not password, PAT), click ‘Close’.
IMPORTANT: Although RStudio asks for your ‘password’, it actually wants your PAT. Remember that your github password is what you use to log into the github website, while the PAT is what you use in RStudio when it asks for a password to confirm pulling or pushing from github.
Finally, and we wouldn’t normally bother with this, but as this is your first commit to the repository, go to the github website and check that your folder and file are showing up there. You should be able to click through to find and read your file.
Modifying and updating
Git (and thus github) is a version control system. Probably the single most important concept about version control systems is they keep track of who changed what, when, and they allow you to go back to any previous version should you later decide against that change.
For this to work, it’s crucial you get out of the habit of using the file system as a sort of informal version control. This is the behaviour of having lots of versions of the same file stored using different filenames e.g. “instructions”, “instructions_final”, “instructions_really_final”, “instructions_really_final_October_update”, and so on. With proper version control systems, like git, this unnecessary and unhelpful.
Let’s illustrate this by updating the file you just added to github.
-
If it’s a file that Rstudio can edit, make an easily noticeable change to it within RStudio. If it’s a file you need another program to edit (e.g. a picture file), then edit it on your local computer and upload. Use the same filename - if you are uploading, you will be asked if you want to over-write. Say yes.
-
In the git tab, you’ll notice a letter “M” icon (for “modified”) has appeared next to your modified file. Click on the ‘Staged’ tick box for this file.
-
Click on ‘Commit’, write a meaningful commit message, and commit the change.
-
Pull and then push your change to github.
Git log as your logbook
Now look at a record of all the changes that have been made to your repository, who made them, and when they made them, by clicking on the ‘clock’ icon on the Git panel. This is the git log, and it acts as autoamtically updated record of who did what, when, and why. As long as everyone writes meaningful commit messages, and commits things as they do them, this record becomes extremely useful.
For example, say you ran one version of your experiment, tested a few people, tweaked it a bit, and then ran some more people. Later on, you’re unsure which participants were run on which version. If everyone is uploading their data at the end of each days’ testing, and committing their changes to the repository as they make them, then we can work this all out from the git log. We can see which people were tested before the expeirment files were changed.
For this reason, it’s important to make frequency, atomic, updates to a github repository. “Atomic” here means in as small units as is useful and reasonable. So, for example, data from a single day’s testing by a single experimenter might be one commit. Another might be to change three documents to update the name of the experiment.
Branching
The changes we’ve made so far can be thought of as a straight arrow going in one direction:
Create repo -> add instructions -> modify instructions
If we want to make an other kind of change, including going back to an earlier version of a file, we have to create another type of arrow, called a branch.
Do this now, like this:
-
Click on the new branch icon in the Git panel (purple, to right of the blue cog).
-
Make a name for your new branch (e.g.
old-instruct) -
Click ‘Create’.
You’ve now created a new branch.
Recovering an earlier version of a file
Let’s say we decided that the change to our file was not in fact an improvement, and we’d like to return to the earlier version. We can do this by using the log to find out the SHA (the ID code) for the addition of the original file to the repository. In my particular repo the SHA is 621ed937, but yours will be different. Here’s how to go back to that earlier version:
-
Click the tiny down arrow next to the blue cog on the Git panel.
-
Select ‘Shell…’ (in newer versions of RStudio, it may come up as ‘New Terminal’).
-
In the new Terminal window you have opened (bottom left of Rstudio), type:
git checkout SHA -- path/to/file.txt
where SHA is the ID code you found earlier, and path\to\file.txt is the name of your file, including the folder it is in e.g. materials/instructions.txt.
This will revert the file back to the older version. Next:
-
Ensure the file is Staged (tick mark showing) on the Git panel.
-
Click ‘Commit’, write a meaningful commit message e.g.
Revert to original instructions, and close the commit window. -
In the Terminal window, type these three commands:
git checkout master
git merge old-instruct
git push
The first changes back to the main branch of the repository. The second merges the changes you made in the old-instruct branch into that main branch. The third pushes those changes to the main branch to github.
That’s it! You’ve now reverted back to the earlier version of your file.
More on branches
Branches are a great way to try things out without accidentally screwing up the main repository that your colleagues are using. For example, say you had an idea about how the stimuli in your experiment might be changed. You could create a branch stimuli-idea, and make all the changes there, committing those changes to that branch, and pushing the changes to github. You could then invite your colleagues or supervisor to take a look athe stimuli-idea branch. You could all work on those changes further in that branch and then, when you’re all happy, you could merge them back into the main branch.
git commands
In an earlier section, we used the command git push to push a change to github, rather than clicking the up arrow. Everything you can do with the graphical interface of the Git panel in Rstudio can also be down with commands. As we also saw, some things can also only be done using commands (like checking out a previous version of a file). Like R, git is an incredibly powerful and useful tool, which you can only get the most out of using text commands, rather than graphical interaces. You can learn more about git here.
One command that can be very useful is git rm, which allows you to remove a file. It doesn’t actually delete it, because you can recover anything that has appeared in any version of the repository, as we saw earlier. However, it does remove the file from the current version of the repository, which can be useful for tidying away files that were temporarily important but are no longer needed.